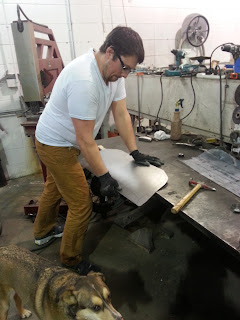
This post is about trying things in a different way. I have never liked the fender skirts on a 49-54 Chev, they don't reach the bottom of the quarter and they are plain and bland. I had attempted to weld a quarter inch rod to the bottom in an effort to flare them out and form sheet metal to them. It looked like garbage and from side to side the didn't match, they looked like the guy who shaves on side burn at a different angle than the other, RIDICULOUS!
If you look closely at the above picture you will see the fender skirt ends an inch above the bottom of the quarter, BLAH!
Above you can see the fender skirt I messed around with. I got the basic shape that I wanted but I didn't like the results so I went back to the drawing board. By laying a sheet of plastic, in this case vapour barrier, over the fender skirt I traced the outline. I then drew a grid on it and measured the profile using a profile gauge. This will help us later to accurately form the shape with the planishing hammer and tweak it with a hammer and dolly.
After I have my pattern, I cut it out and place magnet to hold it to the new sheet metal. The bottom section is a reverse curve so it gets market with a series of dots by scribing the metal along the line in the plastic and then tracing the scribed dots with a marker. The plastic sheet has the profile numbers marked on it as a reference.
After the rough hand shaping I put a 36 radius die in the planishing hammer. Basically what the planishing hammer does is actuates a flat die into the sheet metal beating it against a radiused die of the shape desired. Its like using a hammer and dolly but works much faster.
Its hard to see in this picture but there is a slight crown in this panel now, which matches the fender skirt.
I then put a 1.5 inch radius die in the planishing hammer to rough out the compund curve for the flare. I held the panel to the table with my elbow and pressed the small skinny side of a universal dolly into the bottom of the conpuond curve and work slowly from side to side rolling the lip up.
To finish the edge and roll it up, I don't show it but I placed my pattern over top and marked where the lip needed to be rolled. from the bottom I placed a spoon dolly and worked slowly again working from side to side until the edge was almost completely rolled over.
I am pretty happy with how they have turned out so far. The next step will be another blog post, which I will put the old ones on the car and cut out the nasty stuff. I will then trim these new skins I made to fit to the skirts and weld them in place.


No comments:
Post a Comment